Friday, January 10, 2014

Here is a fun little idea...

A blog I read, called Parenting Miracles, posted an idea today about re-purposing shot glasses to give their kids a little snack.  While I have no shot glasses to re-purpose, I do have cutesy little containers that are cute but not good for much.  Even the tiny Rubbermaid containers that come with the storage kits I find puzzling. If that is all I have left, I just eat it.

So, this idea of presenting my kids a snack in a cutesy little container is so fun and I have been brain storming.  I am going to list some other ideas besides the ones Jessie mentioned:

Peanut Butter and Teddy Grahams
Peanut Butter and pretzels
Peanut Butter and celery
Peanut Butter and Goldfish
Yogurt and pretzels
Yogurt and Goldfish
Yogurt with fruit
Yogurt with Granola on top
Hummus and pretzels
Hummus and cracker sticks
Hummus and pita strips
Maple Syrup and french toast sticks                          
Broccoli and ranch dressing
Grape BBQ Sauce and little smokies
Marinara Sauce and a breaded cheese stick.
Honey mustard and veggies

Here is a fun one:  Frosting and pretzels  (for shame!!!)

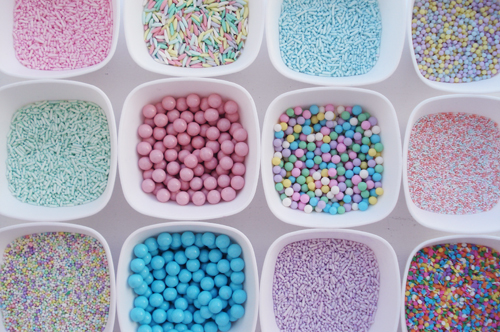
Now, for a birthday party, you could make a sprinkle bar with little bowls of different sprinkles and give each kid a little container of frosting with pretzel sticks.  They could then dip their pretzels in sprinkles for a fun and interactive snack.  How cute!


Here is another example of a cute way to serve the sprinkles.

If you can think of some other cute snacks that can fit in the small containers like a shot glass or a tiny Rubbermaid, please share them in the comments!

Thursday, January 2, 2014

Sweet Rolls

Cinnamon sweet rolls are a SUPER easy and relatively cheap dessert that are ALWAYS appreciated. You only need homemade dough, brown sugar, cinnamon, raisins and melted butter, although other ingredients can be added. Prepare your round pan (layer cake size, 8 or 9 inch) by melting a stick of butter in the pan in your preheating oven. You will use this butter to rub on your rolled out dough.


You need a nice fluffy yeast roll dough recipe. Any recipe for roll dough can be used if it is light and fluffy, prepare dough according to your usual process and after 1st rise do the following:

You roll out a rectangle to a thickness of about 1/2 inch. Rub melted butter across the surface, leaving about 1/2 inch of space around the edges. Sprinkle brown sugar, cinnamon, and raisins onto the melted butter. Roll the dough across the shorter width, sealing the overlapping edge (no butter on it) to the outside of the roll. Now you have a long roll, layered dough with brown sugar and raisins in it. Use a piece of floss or thread, wrap it around the first 1.5 inch of the log, cross it, and pull firmly. This will cut your rolls perfectly without crushing them.


Now, you have some butter left in the bottom of the pan.  It is very important to add some more brown sugar to the melted butterand you can add chopped nuts if you wish. Next, put the roll ends with the cut side up. Then put the rest of the cut rolls into the pan, leaving a scant amount of room between. They will rise more and fill pan and cook against each other.

Bake in oven according to directions for regular rolls, adding some time for the filling. (Sorry, it depends on dough and filling and oven as to how much extra time you will need). Once they are beginning to brown nicely, they SHOULD be done. You MUST let them cool on a rack for a while before taking them out so that the caramelized sugar in the bottom has time to set up and cool a bit. Turn the whole pan over onto parchment or waxed paper. YUM! They will pull apart nicely and you do NOT need a glaze or anything because the butter and brown sugar in the bottom glazes them beautifully.

My grandmother has been making these for 60 years and they are family favorites. Enjoy!

Birthday Party Day!

June 14th was my middle child's 12th birthday party.  She wanted a beach theme since we are having a pool party and I was up for that.  I decorated the ice cream cake and I wanted to share it with you. 

For this project, the best deal you can find is Dairy Queen large round ice cream cake for $21.95 plus tax.  Just ask for a blank cake.  They come that way from the factory to your local store in a plastic bag.  They will have it in the back deep freeze and be happy to hand it to you and collect their $22.

After you get the cake home it goes in the freezer until you are ready to decorate.  Get the blank cake out  and cut off plastic bag.  Do not remove the paper sleeve around the edges until you are ready to apply the kit-kat bars. 

I used blue food spray paint to paint the blue on the top of the cake.  The sleeve keeps your spray from overspraying the cake.  After I sprayed the blue onto the cake, I poured the Nilla wafers crumbs I made around one side of the cake to make a beach.  The sleeve will keep the crumbs from falling all over the side and serving tray.  I also added blue writing gel to the blue area to give the ocean some wave texture.  I just moved up and down in a kind of zigzag pattern while I squeezed the tube firmly.  I made sure that the "water" went up onto the edges of the sand.

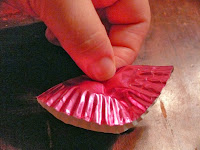
Next step is to decorate the beach scene.  You can make an umbrella from a Q-tip and a cupcake liner.   You will need to trim about 1/2 inch (or a little more) from the ruffled edge of the liner and then fold it in half, flat.  Find the center of the liner and hold it there while you open the edges into 3D.   Just trim one end off the Q-tip and stick the cupcake liner to the other end.  You will want the cotton there to glue onto as it is larger and longer than a toothpick.


The umbrella went on over the bears laying out on the beach.  I made beach towels out of fruit roll-ups and I laid bears on them.  Then I used gummy Lifesavers as floatation devices and teddy grams in the rings.  I also put goldfish crackers in the water.  There are SOOO many cute ideas on Pinterest using fruit and candy items to decorate these cakes, you should DEFINITELY go check them out.


See picture below for the concept, mine was a little different. I will post my picture as soon as I can find it.  :(
This is not my photo.  If it is yours and you want me to remove it, please just let me know.

The final task is the kit-kat edge.  I like this because it gives a nice finish and you don't need to feel like you have to do any other decorating of the cake.  See above that they kept the bars together, I did not.  I think theirs looks more like a barrel and a privacy fence which is cute too.   First tip, use a sharp knife and cut between the bars, this prevents damaging the chocolate coating.   I held my first kit-kat stick up to the cake and decided how tall I wanted them to be.  Once I decide on the height, I then cut all the rest of the bars the same.  You save this until last because the cake will start to soften  and you can stick the kit-kats to the ice cream.   I put them all the way around (it took two 6-packs to do the entire outside of the cake.  Tie any ribbon around the kit-kats and pop it back into the freezer quick to solidify.

Being able to do this on an ice cream cake made my daughter's pool party in June extra special.  I was so glad it turned out cute.  It has taken WAY too long to get this posted.  Too much nursing school and not enough time for other stuff.